Singapore, a tiny little island at the tip of Malay peninsula, is probably one of the world’s most humid country. The average relative humidity (RH) level is 84.2% according to NEA, with thunderstorms occur on 40% of all days when RH can shot up to 100%.
As you may wonder how does this relate to electronics, look at this chip I dropped in my drawer 3 years ago.

For information purpose I list the storage humidity requirement for various items here:
| RH% | Items |
| 50-60% | Painting, Antique, Currency notes, Stamp, Book, Musical instrument, Jewellery, Leather products |
| 40-50% | Camera, Camcorder, Lens, Digital products, CD, Binoculars, Film, Video tape |
| 30-40% | Metal, Semiconductor products, PCB, IC, Battery, Precision equipment, Optical equipment |
| 20-30% | Raw medical, Dye, Seed, Pollen |
| <20% | Special chemical products, Precision electronics components, BGA, LCD |
Buying a dry cabinet is obviously the best approach. In fact I already have a small one for the cameras. But to store all my electronics and computer stuff I need a pretty big one, which costs a bomb, and I simply do not have the luxury of floor space. During a recent house cleaning exercise I decided to convert one of my wardrobes into a dry cabinet. Here is the victim:

There used to have a horizontal bar at the top for hanging clothes but I removed it. There are no shelves. A trip to IKEA brought me these wire baskets:

These baskets are not cheap (S$19/pc), but very sturdy and well below the cost of custom made shelves. I draw some marks in the wardrobe and start the irreversible modifications.

Here comes the main actor – the drying controller. I bought it from China taobao.com at RMB258 (S$52).

It is rated 6W/42W(max), control RH range 25%-55% with drying volume of 200L. I studied for a while and roughly figured how it works: the dry element is very similar to those we saw in “Thirsty Hippo” packet. There is a metal door in the controller. During drying operation the door opens inwards to let the dry elements suck the moisture from inside the cabinet; after a certain time the metal door closes, an electric warmer heats up the dry elements and dispels the moisture to the outside environment. The whole process repeats again and again until a pre-set humidity level is met.
To increase the effectiveness of drying, rubber strips are installed around the door frame.

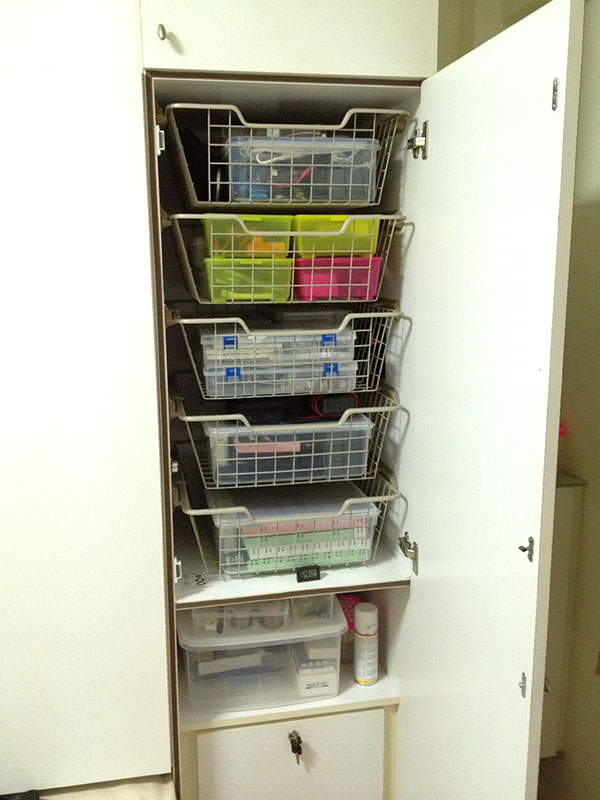
And here come the final product :

During day time when my room humidity reads 69%, here is what inside the cabinet:

It doesn’t reach the advertised 25%. Maybe because the cabinet is not enough airtight and the total volume is larger than rated 200L.
I spend two weeks sorting all my components into plastic boxes. So far I’m pretty satisfied 😉
Wow this is a nice hack! Did you check if the controller is always on? i would be worried about the electricity bill if that was the case.
Actually it seems virtually impossible to make the wardrobe completely airtight. I set the controller to maximum and only achieve 38% RH after two days without opening the door. I can also hear the controller turns on quite frequently (once every 1-2 hours). For the power consumption part I’m not quite worried as it is rated max 48W.
Yes I understand – which was why I asked if the controller was always on, trying to keep it dry. Still, it’s a good way to build your own DIY drybox though. 🙂 One day I’ll have to figure out how to buy stuff from taobao as well.
I can’t seem to be able to find the drying controller .. Any key words or link appreciated.
Hi. Can’t find the drying controller. Any links?
http://item.taobao.com/item.htm?id=14159166713&spm=2014.12193480.0.0
除湿机芯
Thanks!
Greeat reading your blog