For the holiday season I get myself an AVR JTAGICE3. Holding the new shiny emulator and a bunch of Arduino boards, what shall I do? Of course to hop onto the all-hail Atmel Studio and ditch the toy-alike Arduino software. Reason being? Debugging Arduino code with serial console is no fun. I need my single steps, breakpoints and watches back. In fact the Arduino boards seems to be more valuable (to me) without the software. The onboard ISP connector seems to be standard and it “just works” with JTAGICE3. Well, I had this “just works” impression until I tried it on the new Arduino Micro board…
Make the story straight. The Atmel ISP connector combines SPI bus and RESET signal. SPI is used for downloading program, and RESET implements Atmel’s “debugWire” on-chip debug system. debugWire OCD is a very fancy protocol that uses only one RESET pin to debug. ATmega328p supports debugWire, and hence the ISP connector on Arduino UNO can be used for debugging. Arduino Micro uses a newer ATmega32U4 chip. Surprisingly debugWire is missing from the product datasheet, instead JTAG is listed. JTAG uses 4 I/O pins, from Arduino Micro schematic we can see the JTAG pins (TDI/TDO/TMS/TCK) are multiplexed with analog pin A0-A3. It appears I have to sacrifice these analog pins for the JTAG interface.

JTAGICE3 comes with a 10-pin JTAG header, with the definition as follows:

All I need to do is to make an adapter connecting these pins:

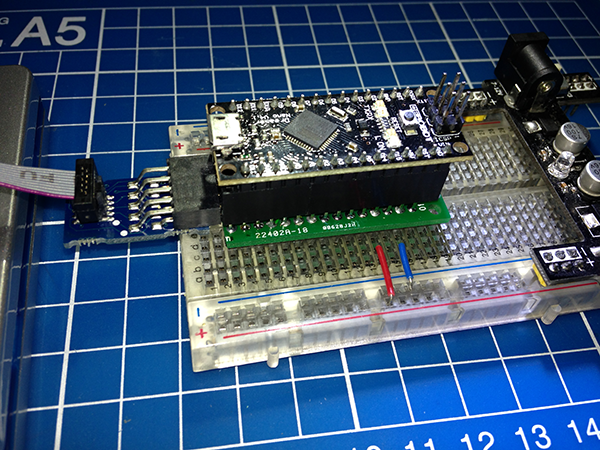
The actual construction is done on a perf board. I made it Arduino “Shield” type so they can be simply stacked together.

I admit it looks quite dangerous when stacked up 😮

I hook up JTAGICE3 and choose JTAG interface in Atmel Studio. And no surprise. Murphy gets me everytime! “[ERROR] No JTAG devices detected.” is the only reply I get. I Scratch my head several hours then to realize how stupid I were. Since the pins PF4-PF7 have been used as analog inputs for Arduino, how can JTAG establish connection with these pins! And the resolution is simple: connect using ISP header and enable the JTAGEN fuse bit. Now I feel the usefulness of ISP connector.

I can finally talk to ATmega32U4 using JTAG and do some debugging. The coming year will be interesting 🙂
Thank you for sharing how you made your home made Arduino Micro JTAG Shield 😉
Your blog post has been featured in the last embedded systems weekly issue http://embedsysweekly.com/issue12-embedded-c-programming/#JTAG_adapter_for_Arduino_Micro
I hope you’ll like it
Thanks. Find many good info there. Have to subscribe.
It is also easy to make plug-in JTAG pigtail connection to Arduino 2560. And I have read that the GCC compiler can produce debug information for Studio. But I am a hardware guy and don’t know how to make the Arduino compiler produce C debugging file for Studio. In fact I don’t even know where to go in Arduino environment to change the compiler command line. Is it easy to explain this?
Bill
Thanx for an easy way of adding JTAG to the 10 bux Arduino micro Pro
This is neat; I hadn’t realize that the 32u4 had JTAG. Do you feel like making your EAGLE files available?
Hi, I’m making that on a perf board and I afraid I do not have EAGLE design.
Thank you very much!
Your sentence: “connect using ISP header and enable the JTAGEN fuse bit” give me the right way to solve my problem: connect Arduino Mega2560 to Atmel-ICE with JTAG.